SEMROC Model #KV-33

Description
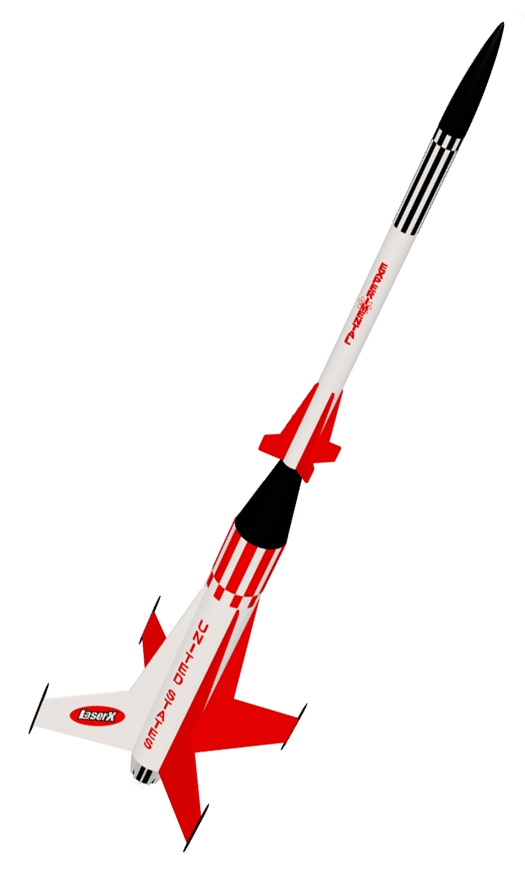
The Laser-X was updated by using laser cut fins. The original balsa nose cone and body tube sizes are used. The parachute is smaller to reduce drift during recovery. the original rubber shock cord is replaced with and elastic cord for longer life. The original method of attaching the shock cord has been replaced by Kevlar cord for greater reliability.
The Laser-X was originally introduced in 1968 and has been faithfully reproduced as a retro-repo by Semroc. It was upgraded with a Kevlar shock cord and adhering to the original balsa nose cone and tube sizes.
Additional Information
- Length: 21.5″
- Diameter: 1.34″
- Weight: 1.8 oz.
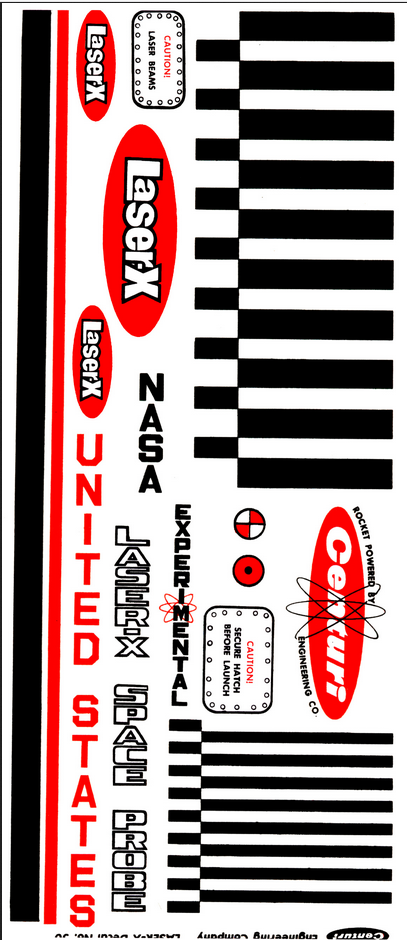
- Decal: Water Slide
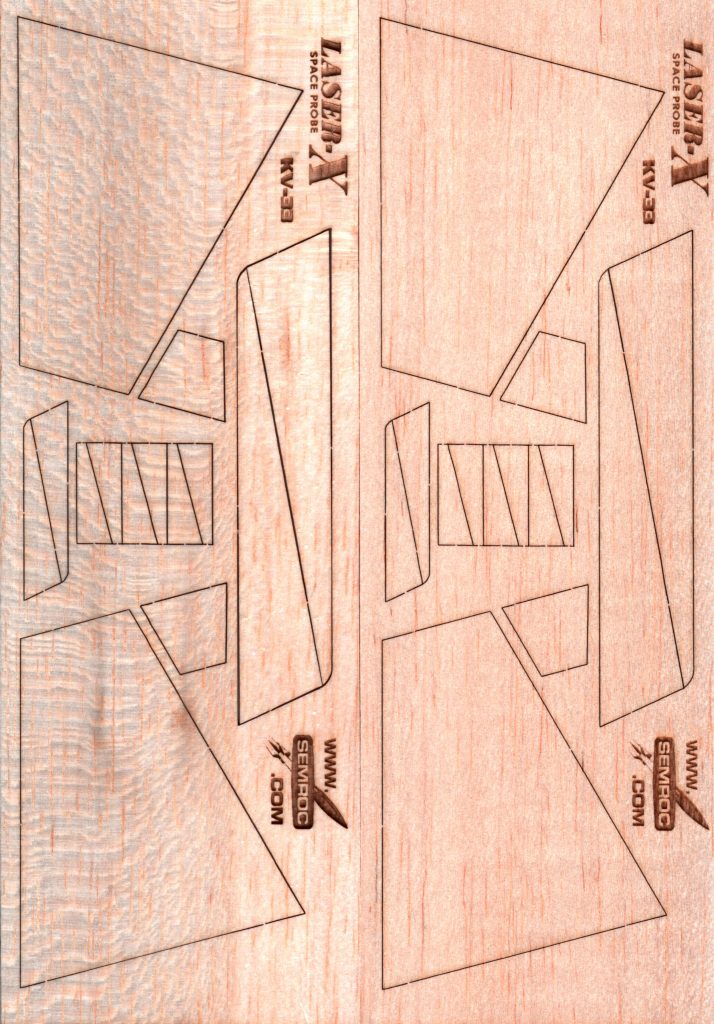
- Fins: Laser Cut Balsa
- Fin Span: 7.0″
- Recovery: Parachute
- Nose Cone: Balsa
- Reducer: Balsa
- Parts List
- Body Tube – ST-5120
- Body T ube – ST1380
- Body Tube – ST730E
- Nose Cone Balsa – BC-524
- Laser Fin Set – RV – 33
- T ube Couplers (2) – HTC-13
- Centering Rings (2) -CR-713
- Centering Rings (2) – CR-513
- Thrust Ring – TR-7
- Launch Lug – LL-122
- Engine Hook – EH-28
- Elastic Cord – EC-124
- Kevlar Thread – SCK-24
- Plastic Parachute – RC-12
- Tape Discs – TD-6
- Shroud Line – SLT -6
- Wooden Dowels (4) – WD-230
- Decal – DKV-33
- Shroud – IKV-335
- Recommended Motors:
- A8-5, B6-4, C6-5
Instructions
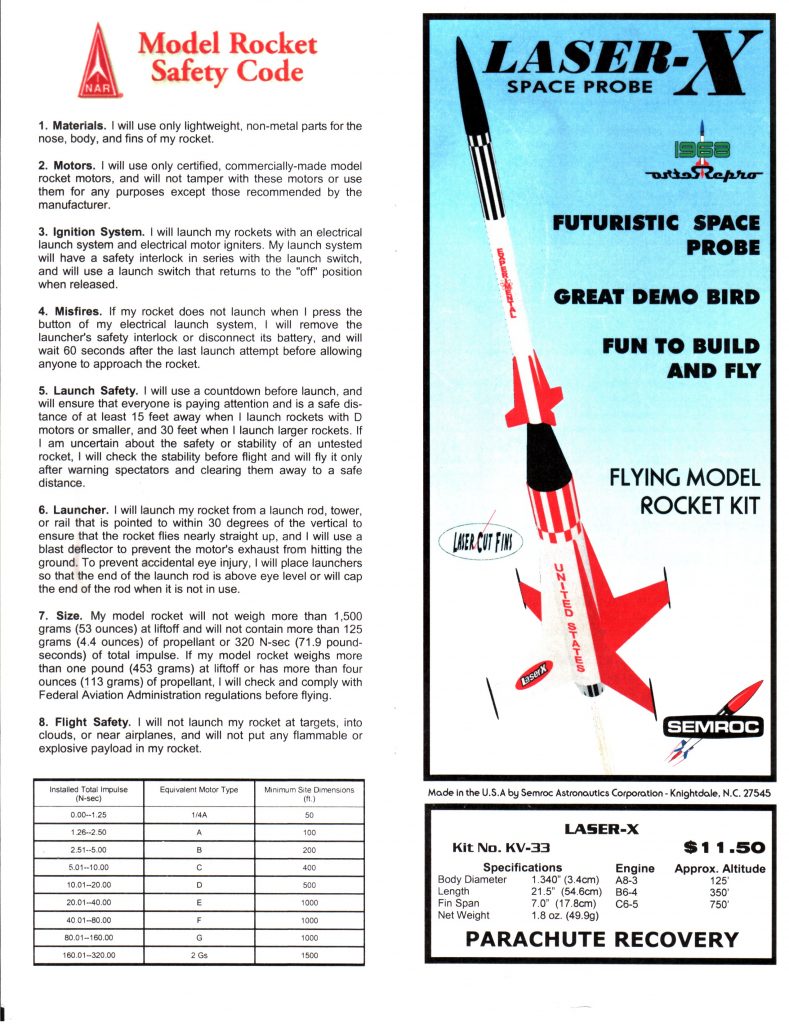
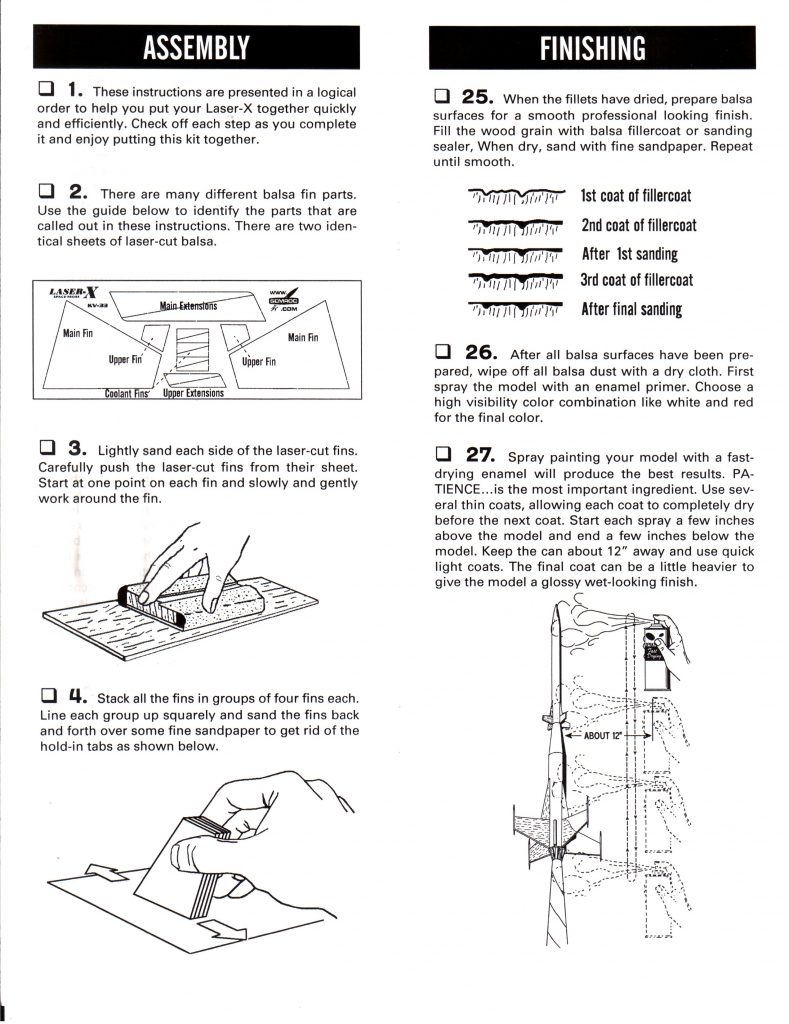
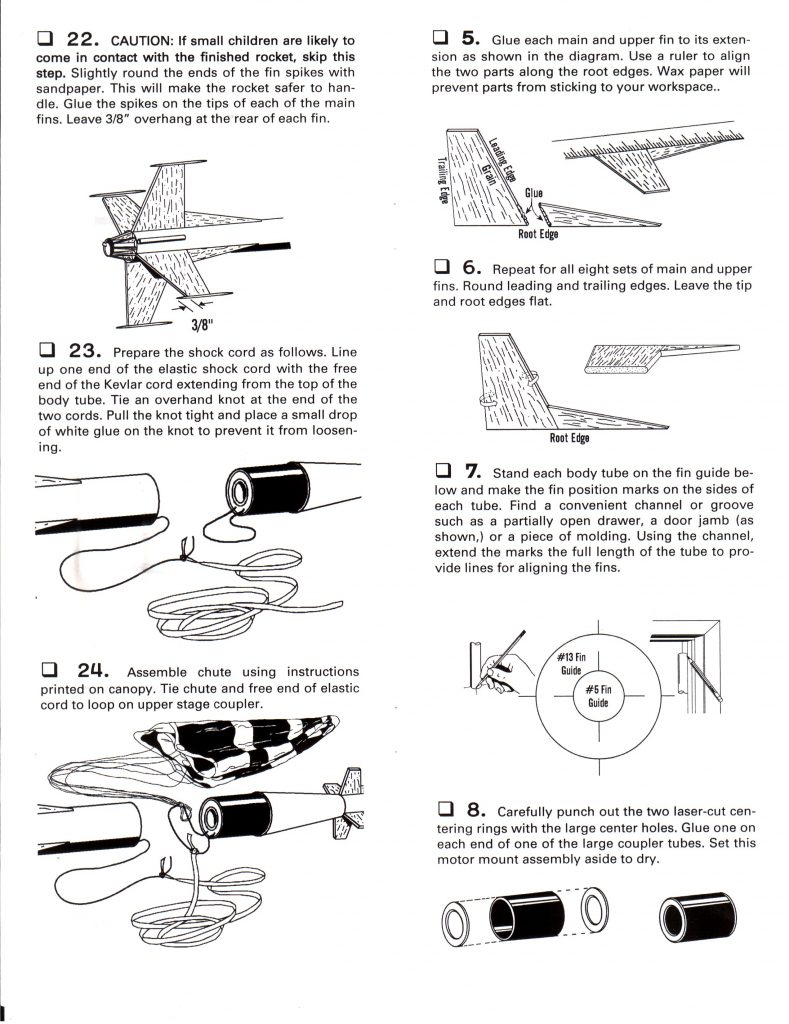
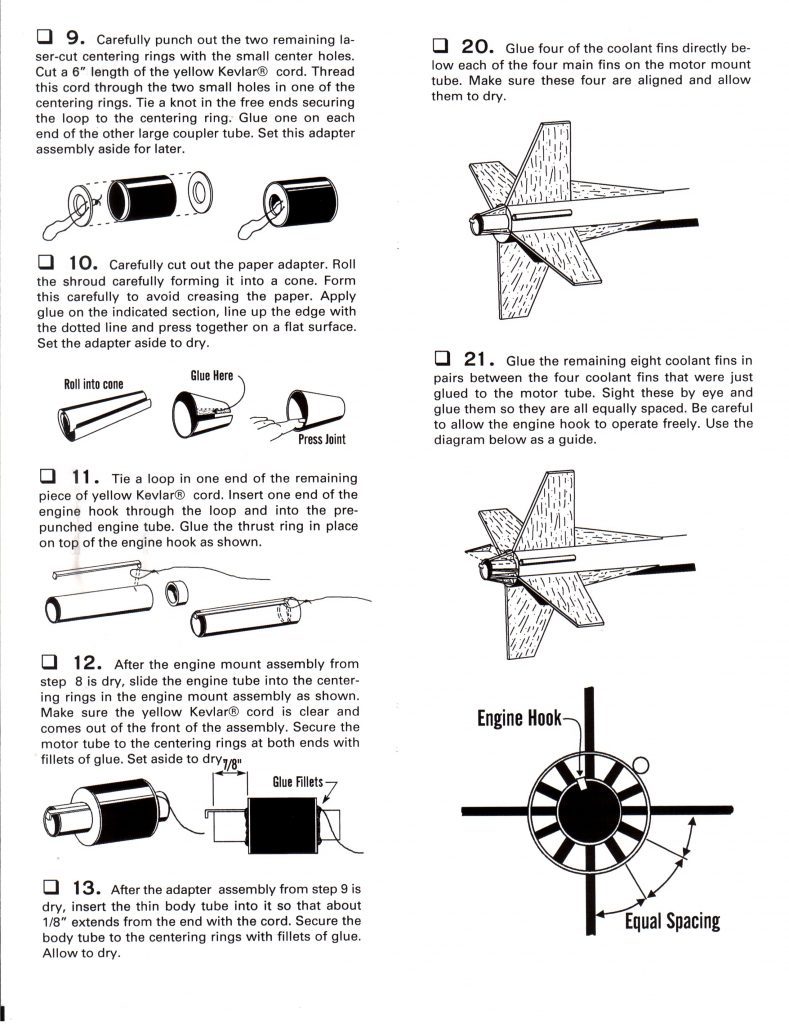
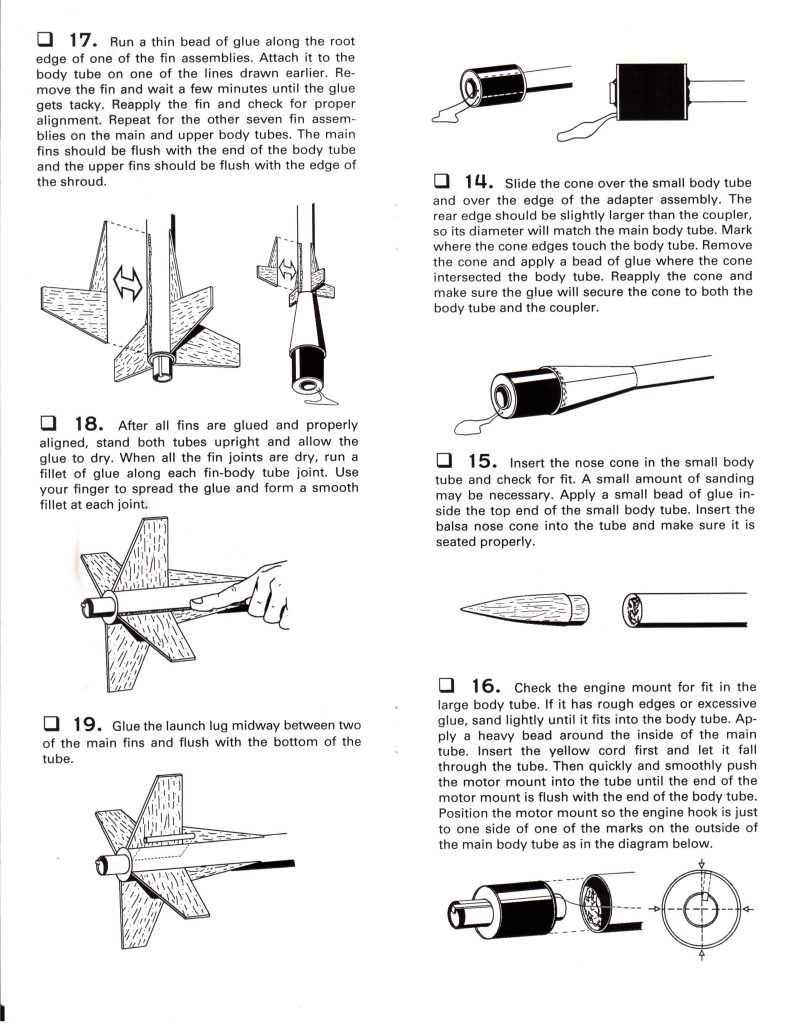
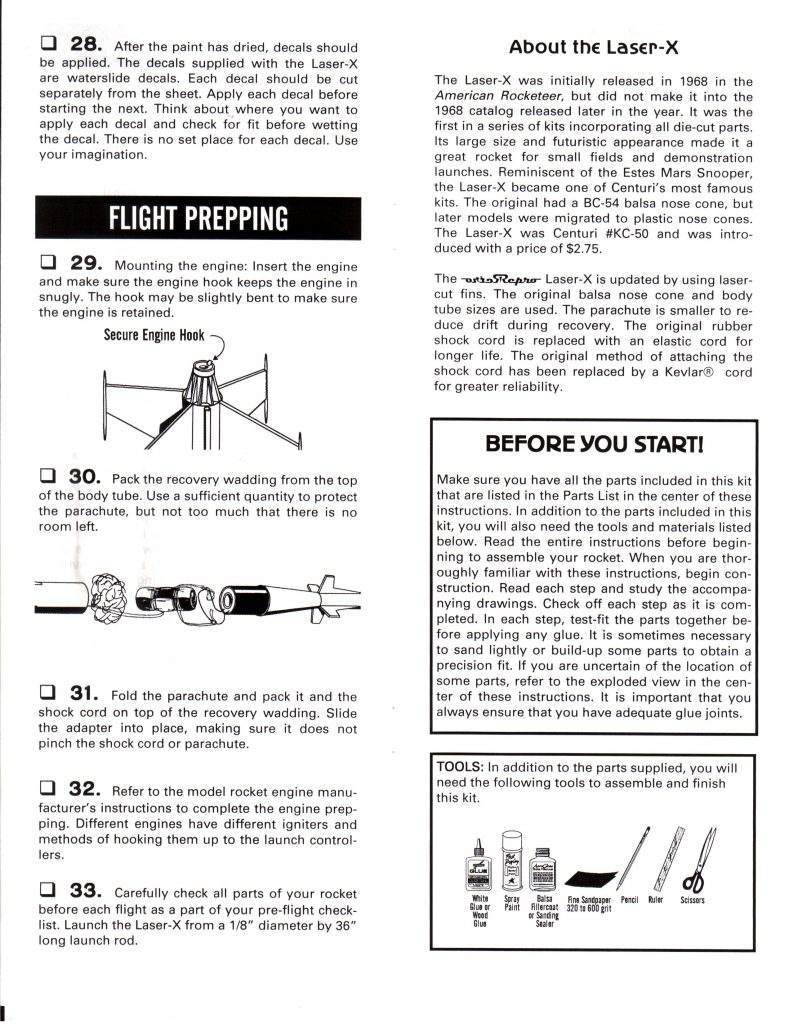
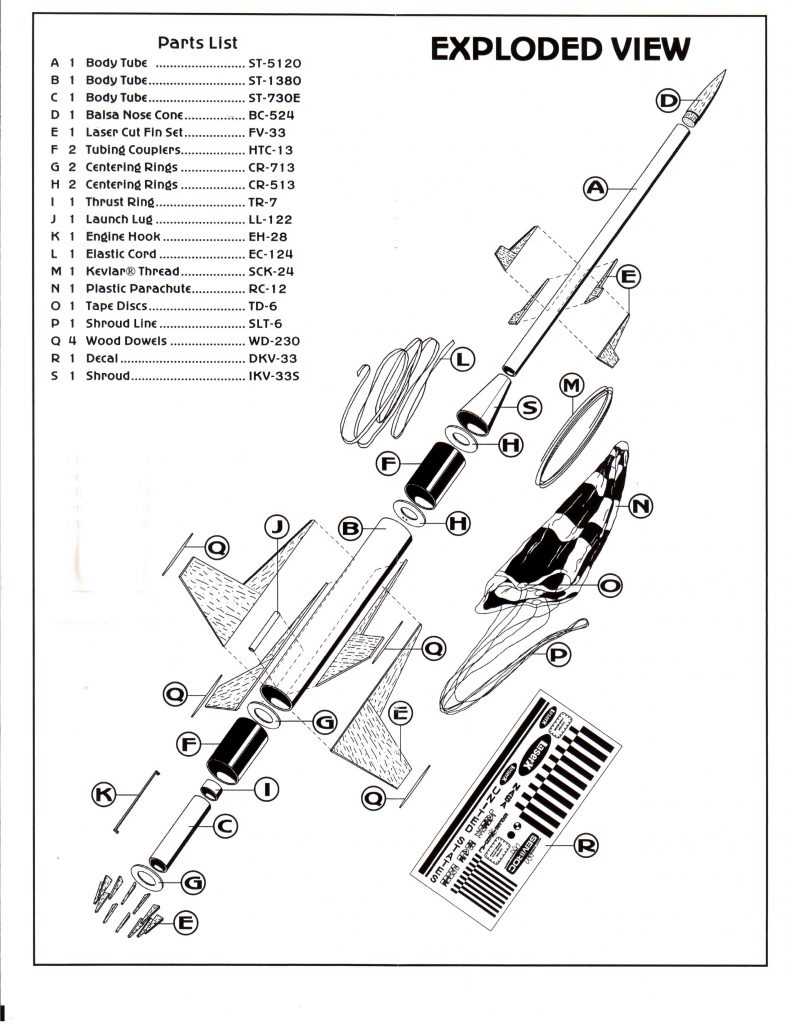
Photo Gallery
Build History
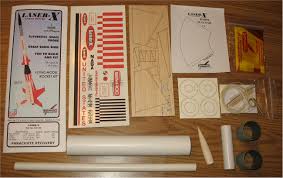
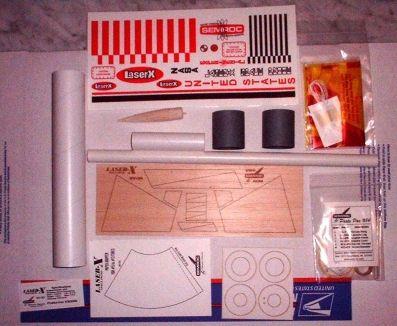
- 12/29/2003 – Purchased Semroc Laser-X from Semroc for $11.50 (Retail $11.50).
- 01/24/2007 – Took pictures of package and contents. Scanned components and directions.
- 01/26/2007 – Scanned components and directions.
- 01/27/2007 – Measured components and recorded on page 52 Book #3.
- 10/25/2007 – Glued centering rings with larger holes onto edge of tube coupler. Punched out two holes on centering ring with small hole and tied a 6″ piece of Kevlar cord to the ring through the holes. Glued it to one end of hte other large body tube coupler with the loop outward and glued the other centering ring to the other end of the tube coupler.
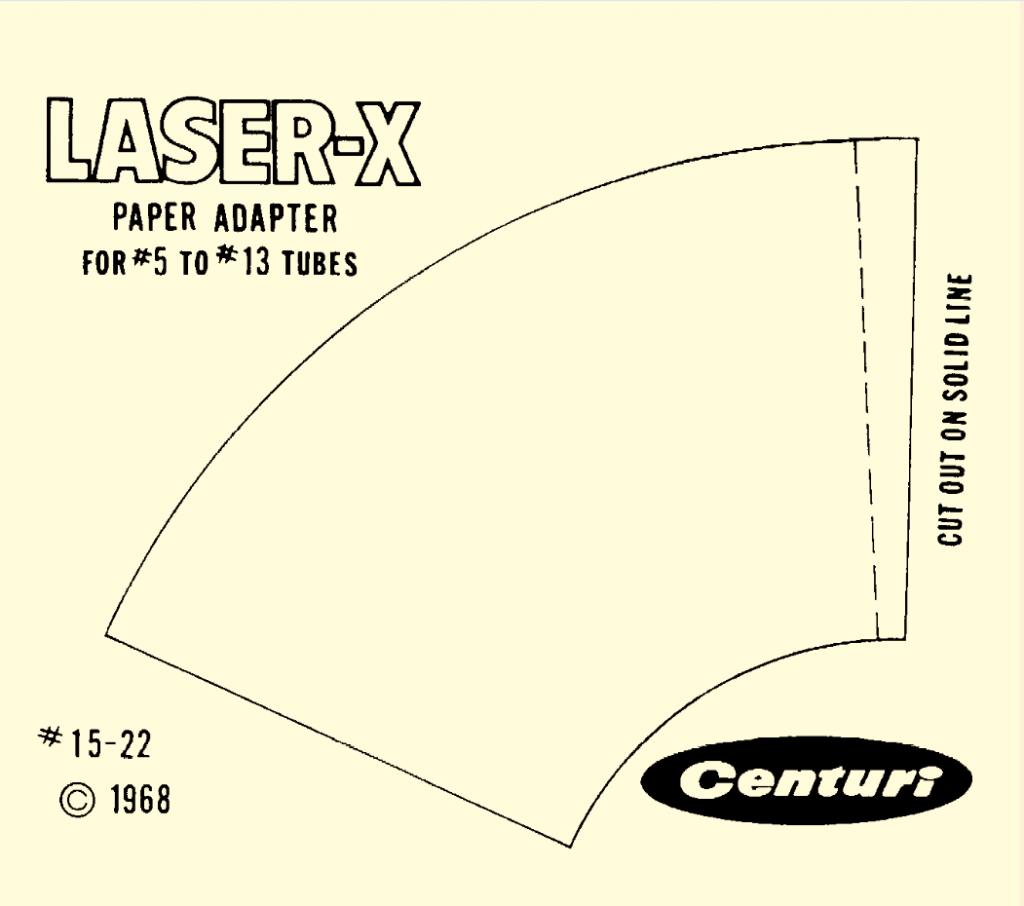
- 01/24/2008 – Cut out adapter, formed into a cone and glued edges together. Marked large and small body tubes with fin guide and extended lines the length of the body tube. Installed engine holder into engine tube. Glued thrust ring into forward end of motor mount tube. Tied yellow Kevlar cord around engine holder and pushed engine tube into larger body tube coupler assembly so the end of the motor tube extends 7/8″ from the adapter. Applied a fillet of glue to the tube joint. Pushed the smaller body tube into the smaller holed tube coupler so 1/8″ extends out. Glued the body tube joint and filleted.
- 01/25/2008 – Filleted other side of coupler joints on each body tube. Glued shroud cover on smaller body tube. Glued smaller fins. Glued motor mount assembly even with aft end of large body tube.
- 01/26/2008 – Glued fins to lower body tube. Filleted 2 sets of fin joints.
- 07/27/2008 – Filleted remaining fin sets.
- 01/28/2008 – Destroyed rocket trying to fix glued engine mount assembly glued too far inside main body tube.
- 02/02/2008 – Built a new motor mount assembly. Cut 8″ length of BT-7 and marked fin alignment guide lines.
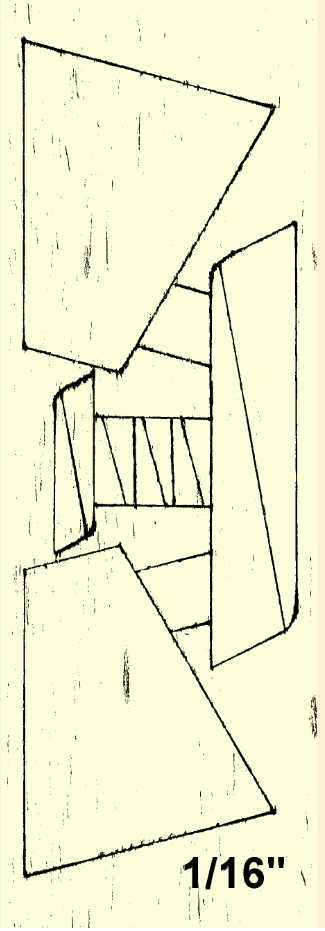
- 02/03/2008 – Using fin sheet pattern, printed out and cut from 100# paper the two fin sheet templates. Using spray adhesive, glued them to 3/32″ balsa stock. Cut out the fins, removed the paper and glued the fin pieces together.
- 02/05/2008 – Fixed broken upper fin assemblies. Glued fins to main body tube.
- 02/06/2008 – Glued last fin to lower body tube. Filleted joint. Glued one fin to upper section at the transition base.
- 02/07/2008 – Glued two more fins and filleted them.
- 02/08/2008 – Filleted final fin joint.
- 03/01/2008 – Finished gluing vanes in engine tube.
- 03/02/2008 – Put finishing touches on fillets.
- 03/15/2008 – Glued and filleted launch lug to body tube. Tied shock cord to both Kevlar cords. Measured four wooden dowel 3/4″ from end and glued to fins.
- 05/04/2008 – Sprayed model with Krylon Gray Primer.
- 07/18/2009 – Sanded model with 400 grit sandpaper. Masked fins and spray painted model with Krylon Gloss White #1501.
- 09/17/2020 – Repair – Glued 5 coolant fins to aft end of body tube. Glued 2 of 3 fins to body tube.
- 09/18/2020 – Repair – Glued last fin to body tube.
- Note: Made new transition piece. See page 74 Book #4.
- 12/16/2023 – Hand painted dowels with Pactra A7 Gloss Insigna Red water soluble acrylic enamel.
- 05/02/2024 – Hand painted nose cone and adaptor with Testors #2633 Acrylic black paint marker.
- 05/08/2024 – Hand painted upper fins with Pactra #2633 Acrylic Red paint marker. Masked lower body tube and one fin. Spray painted with Rust-oleum #327938 Satin Apple Red.
- 05/10/2024 – Applied waterslide decals. Took picture of finished model. This completes construction of Semroc #KV-33 Laser-X model rocket.
Flights
| Date | Location | # | Motor | Comments |
Leave a Reply
You must be logged in to post a comment.