
Description
The original rocket lengthened to make room for dual deployment. This brute was designed to last and comes with a lifetime guarantee.
Additional Information
- Length: 70″
- Diameter: 3″
- Weight: 3# 5oz.
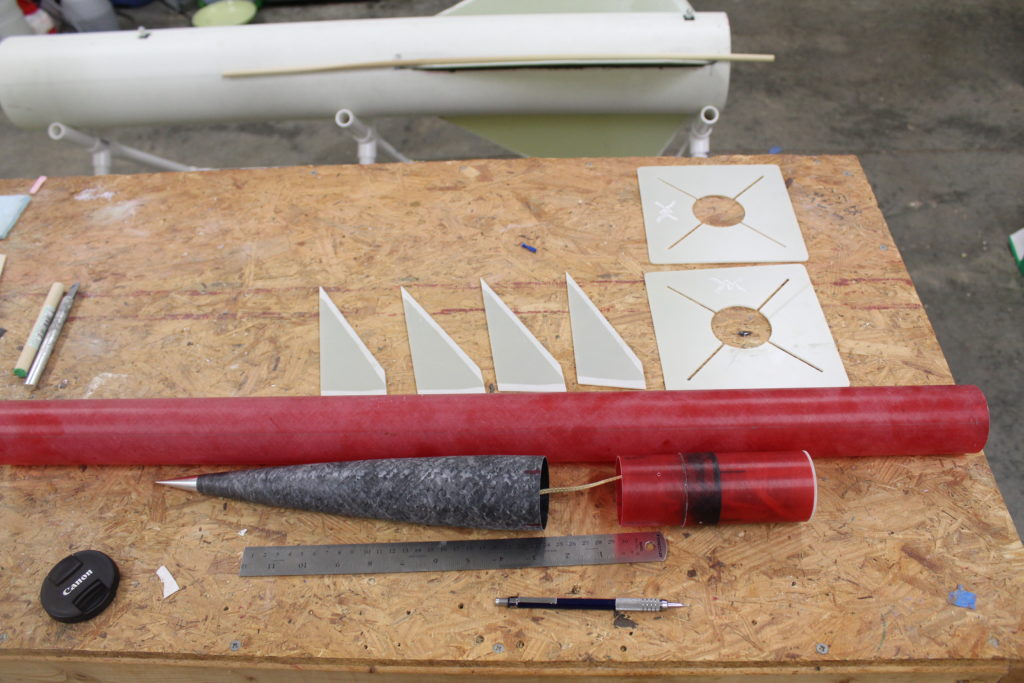
- Booster: 44″ Fiberglass
- Parachute Bay: 22″ Fiberglass
- Vent Band: 1.5″ Fiberglass
- Nose Cone: Filament wound stepped aluminum tipped
- Centering Rings: Fiberglass
- AV Bay Lids: Fiberglass
- Motor Mount: 54mm Fiberglass
- Shock Cord: Kevlar & Nylon
- Recovery: 22″ Parachute
- All fiberglass construction with lifetime guarentee.
- Filament wound stepped aluminum tipped fiberglass nose cone.
- 54mm motor mount.
- CNC Cut Stepped AV-Bay Lids
- Stainless Steel Nuts, Washers, Eye Bolts, & Quick Links
Instructions
Photo Gallery
Build History
- 11/08/2008 – Purchased From Nocturnal Knight Rocketry for $175.99 (Retail $184.28)
- 11/11/2008 – Checked out parts after opening package. Printed out documentation file from CD. Epoxied eye bolt to electronics bay bulkhead and nose cone threads and nuts.
- 11/12/2008 – Drilled two 1/4″ holes through both bulkhead assemblies.
- 11/13/2008 – Attached threaded rod to one end of bulkhead using washer and nuts on both sides.
- 11/14/2008 – Epoxied other side of bulkhead nuts in place with 5 minute epoxy. Marked electronics bay tube at 3″ and epoxied outside sleeve to tube with 2 hour epoxy.
- 11/15/2008 – Drilled top bulkhead to electronics bay hole with 9/32″ bit to enlarge the holes slightly so the threaded rod will not bind in the holes. Sanded edge of bulk plate on electronics bay.
- 09/01/20013 – Sanded nose cone shoulder and inside of fiberglass body in an effort to get the nose cone to fit. nose cone is still to tight in body tube.
- 09/06/2013 – Epoxied forward and middle centering ring into body tube and applied fillets to one side.
- 09/07/2013 – Applied epoxy fillets to other side of centering rings.
- 09/08/2013 – Attached one side of harness to motor mount tube.
- 09/09/2013 – Attached other side of harness to motor mount tube. Used masking tape to temperately hold the harness end to the motor mount tube. Removed masking tape as epoxy cured.
- 09/19/2013 – Epoxied two forward centering rings into sustainer tube.
- 01/13/2023 – Epoxied 1st fin into body tube slot against motor mount tube. Noticed two centering rings were obstructing part of body tube slot therefore it must be modified to fit into slot.
- 01/14/2023 – Removed material on centering ring that extended into fin slot with Dremel Tool. Epoxied remaining fins in place.
- 01/15/2023 – Epoxy filleted fin joints.
- 03/20/2024 – Applied self-adhesive decal to coupler outer body tube.
- 04/13/2024 – Spray painted nose cone with Krylon #53538 Gloss Yellow and lower portion of main body tube with Krylon #2709 Gloss Icy Grape. Spray painted upper portion of main body tube with Krylon #2709 Gloss Icy Grape.
- 04/14/2024 – Spray painted payload body tube with Krylon #8815 Gloss Mandrain. Using Dremel tool removed broken fin filletes. Applied new epoxy filletes to two fin joints.
- 04/15/2024 – Applied epoxy fillet to remaining two fin joints.
- 04/16/2024 – Spray painted lower body tube fin joints with Krylon #2709 Gloss Icy Grape.
- 04/17/2024 – Masked body tube area near fins.
- 04/19/2024 – Drilled 2 holes using a #31 (0.120″) bit and taped it using a 1/8″ #32 tap bit. Epoxied 2 1010 rail buttons into holes. This completes construction of Wildman Wildman III Dual Deploy high power rocket. Took picture of finished rocket.
Flights
| Date | Location | # | Motor | Comments |
Leave a Reply
You must be logged in to post a comment.